Combining 3D Printing and Audio Engineering
Ever thought about combining 3D printing and audio engineering? I did! Instead of buying expensive surround speakers, I decided to 3D-print my own. Here’s how it went!
The small speakers I had been using as surrounds are from an older Kenwood system (CRS-155), which I once picked up at a thrift store for next to nothing. They’ve always sounded kind of hollow to me, but since they were only handling surround sound, I never bothered to upgrade them—until now.
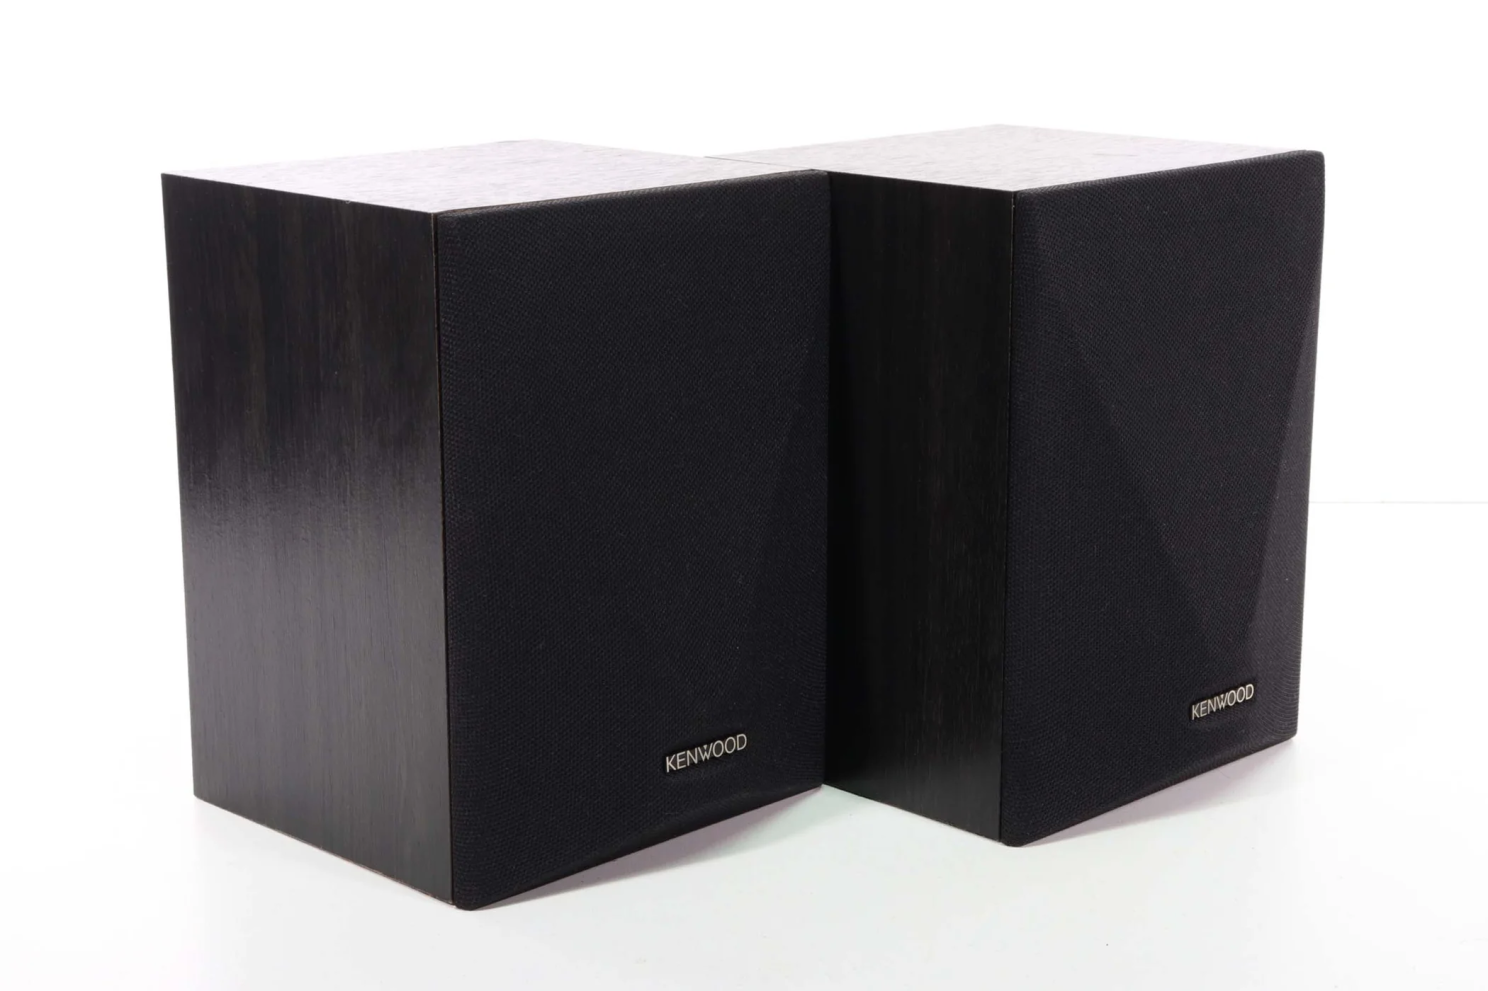
I use a pair of Klipsch RP500M’s as main drivers, and they sound great. These little Kenwoods just won’t cut it any longer. Obviously, I could just buy new surround speakers, but where’s the fun in that? Since I recently bought a 3D printer to play around with, I thought: why not print a couple of speakers and see if I can do better on a budget?
The Drivers Link to heading
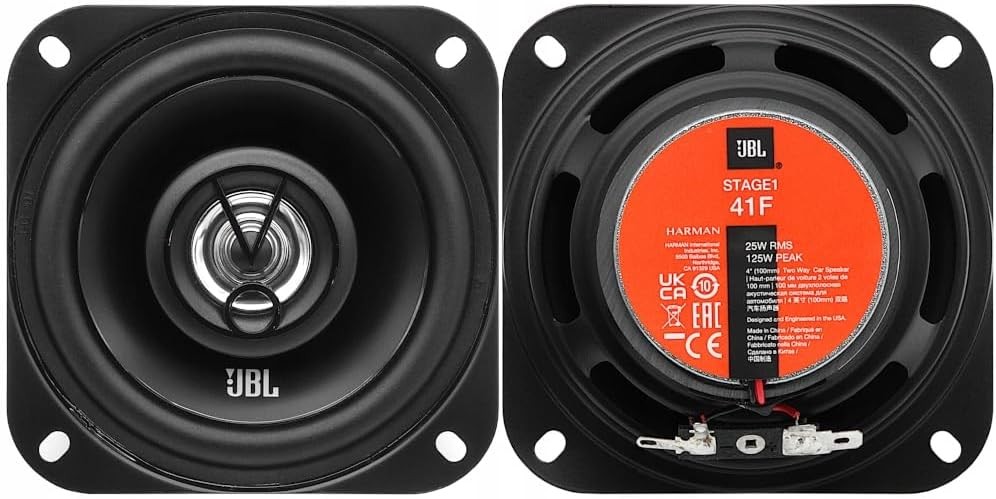
Of course, it’s not possible to print the most important part of speakers: the driver. So, based on no prior knowledge, I chose these JBL drivers. They’re 2-way (a small woofer and a tweeter, which should be good for higher frequencies) and seem to have solid reviews.
The Casing Link to heading
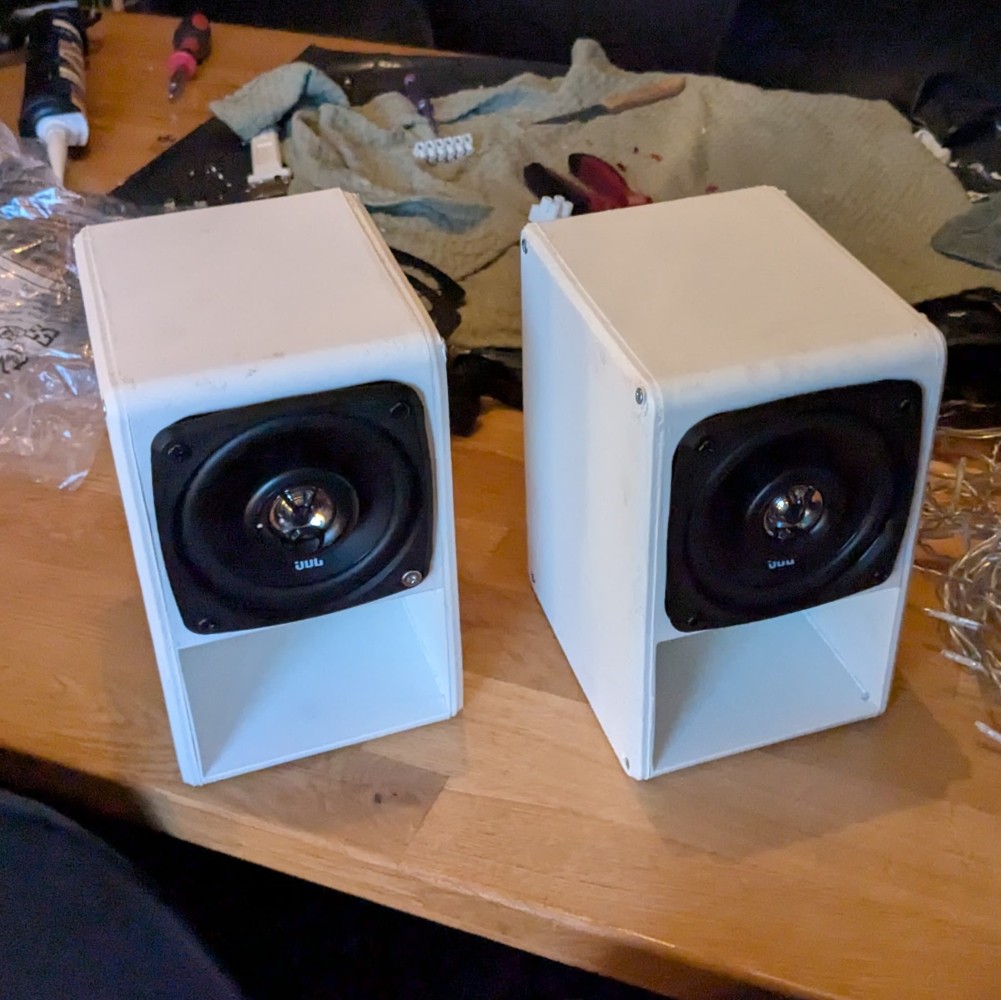
Next up: the casing. I recently bought a 3D printer—the BambuLab A1—and it’s been so much fun to quickly prototype ideas. I’ve printed some basic stuff, but this is my first real project. Luckily, someone, somewhere on the internet, had already figured out what the best design for a 3D-printed speaker would be.
Since I’d be driving these speakers from my Denon AVR, I opted for a very simple passive option, which was easy to print. It’s advised to include some kind of damping inside to reduce internal reflections, so I opted for some stuffing from an old cushion I had lying around.
After printing and assembly, I’m kind of proud of these little things.
Mounting and Testing Link to heading
After mounting them to my ceiling as surround speakers, the real test came: how do they sound? I think they sound a lot better than the old ones. They seem to have a little more range, which really helps when watching movies.
I’m no expert on speakers or tuning, but I fell into a rabbit hole trying to measure this setup.
Most AVRs have room correction built in. Denon uses Audyssey MultEQ-X to measure the frequency response of each speaker and adjusts for this. It comes with a calibrated microphone and runs a test tone on each speaker to configure the setup. Using the Audyssey Android app, you can extract the data it measures. This app allows you to tweak all kinds of parameters (enough for a whole other blog post), but I’m not experienced enough to dive deep into that. Instead, I recommend watching this helpful video!
After some searching and browsing Reddit, I discovered this data can be imported into software called REW (Room EQ Wizard). I used this to compare the old speakers and the new ones.
The Results Link to heading
Here’s the result:

Green: old, Blue: new
I’m quite pleased with this! The graph clearly shows that my impression was correct—the new speakers perform better at high frequencies than the old ones, and you can hear the difference. After letting MultEQ-X work its magic to equalize the sound in my room, I feel great about this upgrade!
The Costs Link to heading
I won’t try to calculate the exact savings because speakers can get as expensive as you want them to be. However, this project was quite affordable:
- JBL drivers from Amazon: 27 euros
- 1kg of white filament for 3D printing: 16 euros
This project showed me the power of combining modern tech like 3D printing with traditional hobbies. For less than 50 euros, I’ve improved my home cinema setup and learned a ton in the process. The best part? The satisfaction of hearing those little speakers come to life!
Thinking of trying something similar? Feel free to reach out—I’d be happy to share more details!